Posts

How Preparing to Remove Your Stuck Shower Head?


Determine why your shower head is stuck. When a shower head is in excellent condition, you should be able to remove it with your hands. If this is not possible, you will need to remove the shower head through other means. Before making any further attempts to remove your shower head, evaluate the fixture to determine why it is stuck:


Search for signs of rust—is there an orange or copper colored ring around the shower head’s connection to the shower arm? Search for signs of mineral build-up—is there a white ring around the the shower head’s attachment to the shower arm? If there are no signs of rust or mineral build-up, it is likely that your shower head is attached too tightly.


Turn off the water supply. Typically, if you are removing your shower head by hand, it is not necessary to turn off the water. Removing a stuck shower head, however, presents more challenges and risks. Therefore, it is advised that you shut off the water source. The water valves may be located in one of two places: Under the bathroom sink. In the basement directly below the tub.


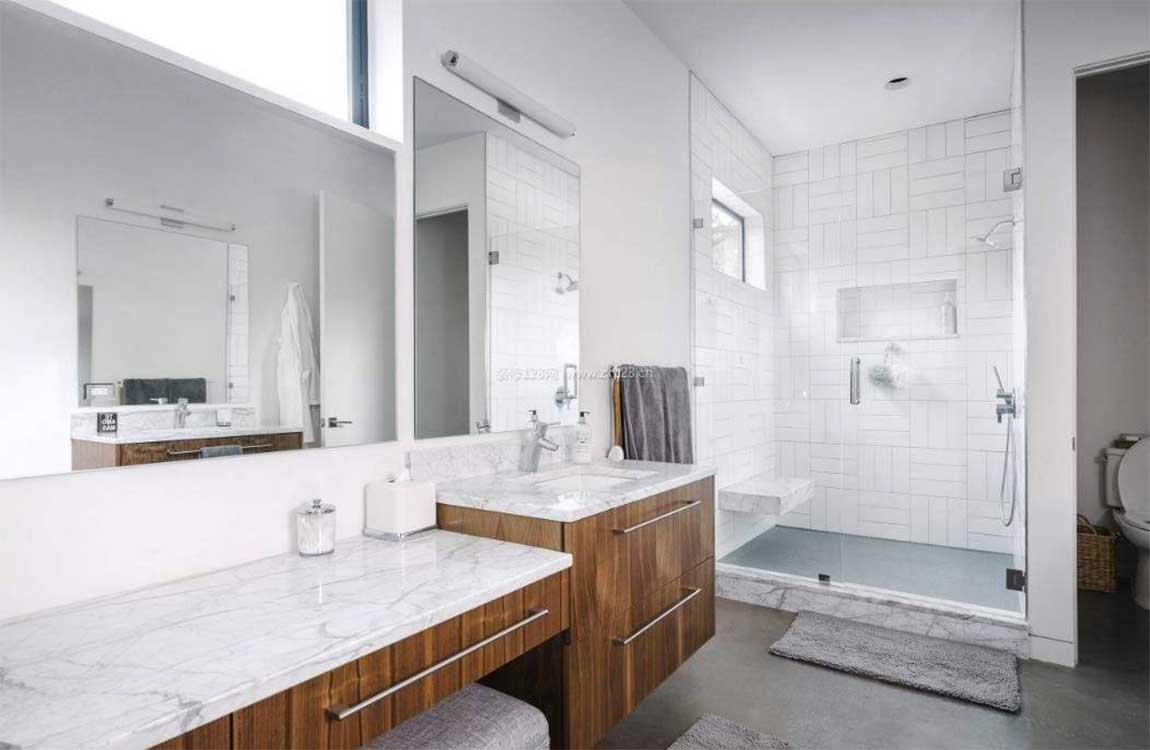
Prepare your work space. Throughout this process, you will work with tools and chemicals that could damage your shower or tub. To prevent damage, cover the floor of your shower or tub with a thick work blanket. You will also handle small bits and pieces. To prevent the loss of parts, stuff a cloth down the drain.


Some kits may come with a spray-on finish. If you use a sprayer instead of a brush or roller, try to spray evenly and in 1 direction. Make sure your walls and fixtures are well-protected by tape where there is a risk of paint spray hitting them. Let your bathtub sit for 2-3 days before you use it. The new finish needs to set completely before you run water over it.

How to Seal Around a Basin or Bathtub with Silicone?


Learn how to seal a basin or bathtub using silicone or caulk. This process of silicone sealing stops water penetration into joints around wash basins, bathtubs or shower trays. Prepare the area. Remove any old silicone from the work area. This can be done with a utility knife. Any contaminants like oil and grease could prevent the silicone from bonding so clean the area thoroughly with alcohol.


Load the silicone gun. With a knife, cut the tip at 45 degrees, keeping the hole fairly small. This will give you better control over the amount of silicone released. The opening should not be so big that a bead cannot be formed, and it should not be so small that caulk tube seems highly pressurized. Pop the silicone seal. Most tubes have a thin barrier inside the tube to prevent the caulk from curing.


Many silicone guns have a tool to do this built on them. However, if yours does not, then a long nail or something similar will work. Load the tube of silicone into the gun. Test the sealing. Silicone sealing can be tricky. Hold the caulk gun over trash and depress trigger to move caulk forward, filling the tip. Caulk should flow out, not squirt or drip. Release the trigger lock to relieve the light pressure inside the tube.


You may want to first practice on a test piece if you have never done it before. Use the corner of a cardboard box. This will give you a feel for the gun and the rate of the silicone flow. The tip should be slightly above the surface, nearly touching. As you begin to press the trigger, watch the flow of caulk. With one steady motion, move the caulk gun straight along seam, creating a uniform bead.


Before flow stops, quickly release the trigger and begin to press again as you continue to create a uniform bead the entire length of seam. Do not stop until you reach the corner. Begin to gently apply seal around the desired area. For best results, hold the gun at a 45 degree angle. You want to apply the caulking in an even and steady manner. Be careful not to apply too much as it can be tricky to remove the excess.

How Cleaning the Tub?


Turn on your bathroom fan and open the doors and windows. The fumes from the cleaning agents and bathtub reglazers are dangerous, so it’s important that you ensure your bathroom is well ventilated before getting started. You should also open the doors and windows in the rooms adjacent to the bathroom for air flow.


If you don’t have a fan or a window, be sure to open as many windows in the adjacent room as possible to increase airflow and allow the fumes to exit. Use a box fan to increase air flow. The fan will not only help to ensure air is being circulated through the bathroom, but it will also help to dry the bathtub faster. The tub will need to be completely dry before moving on from a number of steps in the refinishing process.


Place the box fan in the window for maximum circulation. If you don’t have a bathroom window, place it in the bathroom doorway instead. Use a putty knife to cut away the caulk sealing the tub. All the caulk will have to be removed before you can refinish the tub. Most of the caulk will be in the seam where the tub meets the wall and the floor, but there may also be a strip that’s sealing any glass shower doors over the tub.


To remove the caulk, slice into it with the edge of the putty knife lengthwise, like you’re splitting it in half. Continue to slice into the caulk like that until it becomes loose enough to cut out. Once there are a number of slices through the caulk, it will be easier to use the putty knife to pry up and remove the caulk.


Remove any remaining caulk with a razor blade and sandpaper. A razor blade isn’t very effective for large deposits of caulk, but it will do wonders on hard to remove, thin layers than remain after most of the caulk has been removed. Most caulk can be found where the tub meets the wall, but in bathtub showers with glass doors instead of a shower curtain, there may also be caulk where the door fixtures meet the tub.

How Leveling and Prepping Your Work Area?


Purchase a tub that matches the size and layout of your old one. Measure the size of the alcove and note the drain direction. Use a tape measure to find the maximum length and width of the alcove. Note whether your drain is on the left, right, or center of the tub Find a tub from your local home store that fits in the alcove and has a drain in the same place.


Most standard tubs are about 5 feet (1.5 m) long and 2 1⁄2 feet (0.76 m) wide.
Common Types of Bathtubs: Acrylic and fiberglass tubs are the cheapest and the easiest to maneuver due to their light weight. Cast-iron tubs are durable and hold heat longer, but they are heavier and difficult to maneuver.


Level the floor with an underlayment if it’s not already flat. Underlayment is a thin layer of concrete that smooths the surface of your floor. Check your floor with a level to see if it sits flat. If not, mix the underlayment following the package instructions and spread it across your floor with a flat trowel. Smooth the surface and allow it to dry for 1 day so it has time to set.


Applying a layer of underlayment allows you to remove the tub easier if you need to fix any plumbing issues. Underlayment can be purchased from your local hardware store. Fit the new tub into the alcove and mark the height of the flanges. Set your new tub into the opening where the old one used to be. Make sure your tub sits level on the floor.


Use a pencil or marker to trace a line on your studs at the same height as the flanges on your tub. Once you have each stud marked, take the tub out from the alcove again. If the tub isn’t level, place hardwood shims underneath it until it sits flat. Attach ledger boards to the studs below your flange marks. Nail or screw 2 in × 4 in (5.1 cm × 10.2 cm) boards so the top edge is even with the marks you drew on the studs. Use flat, straight boards that are the same length as the sides of your tub.

How Protecting Your Travertine?

Squeegee and wipe down your travertine after showering. Use a squeegee to remove excess water from the tile after showering. Then, use a towel to wipe your travertine dry to keep soap scum from building up over time. Plus, it’s easier to remove soap residue before it dries.

Pay special attention to pools of water in corners and around edges. If you have a glass shower door, leave it open after showering to allow the water to dry. Establish a regular cleaning routine. Soap scum can cause hard water deposits to accumulate on your travertine. To keep your shower looking its best, clean your travertine shower with non-acidic cleaner a once a week.

If you have a detachable shower head, use it to rinse the tile with warm water after showering to remove soap scum. Creating a calendar reminder can help you remember to incorporate cleaning your shower into your household routine. Clean travertine as soon as something spills.

Whether it’s a colored shower gel or shampoo tinted to enhance hair color, when something spills on your travertine, clean it up right away. Certain bath products contain dyes, which can permanently stain your stone. Inspect grout and tiles for damage.

Bits of grout breaking off can scratch your travertine and trap dirt and grime. Cleaning is a great time to get up close and personal with your tile. Examine your grout and stone for cracks or chips. Be sure to replace chipped or broken tiles and have your grout touched up wherever necessary.

How Doing Routine Shower Cleaning?

Clean your shower after you use it. The running water in your shower loosens surface dirt and softens soap residue on your travertine tiles. For optimal results, tackle shower cleaning after your shower has primed the tiles for you. Spray your wet tiles with a non-acidic soap scum remover. Travertine, like all limestones, is extremely sensitive to acids.

Use a non-acidic stone cleaner, such as Granite Gold Shower Cleaner or MB-3, and spray the travertine thoroughly from the top to the bottom. Let the cleaner sit on the stone for 10 minutes to begin dissolving any soap scum. Given travertine’s acid sensitivity, always avoid applying vinegars or other citrus cleaners.

Use warm water to scrub the tiles. Fill a bucket with warm water, and begin scrubbing the tiles with it. Use a diamond-shaped brush to wash the entire top row of tiles, applying firm pressure to loosen soap scum. Progress to the next highest row, methodically working your way to the bottom row. This way, dirty water will run down on tiles you’ve yet to clean.

Focus particular attention on any surface holes in the travertine when cleaning, as they can collect soap scum. A diamond-shaped brush makes it easy to clean your shower’s innermost corners easily, but any shape is fine. Use a soft toothbrush to scrub grout.

Spray your grout with the non-acidic cleaner you used on the tile, and scrub each grout line back and forth with an old toothbrush. Focus your scrubbing on areas of mildew growth and discoloration. Many grout formulas contain acids and should not be used with travertine. If possible, use a toothbrush with softer bristles, as hard-bristled toothbrushes may etch the surface of the stone.

Bathroom Decorate

Decide on a style. A bathroom cabinet should fit into its environment, so you will want to choose cabinetry that complements your home’s existing furniture and architectural details. Consider the following design elements: Doors. You may opt for open-shelved cabinets, which have no doors, or for decorative glass or solid doors.

Material. Bathroom cabinets come in a wide array of materials, including wood, plastic, wicker, glass, bamboo, porcelain and laminate. Accessories. Pay attention to things like drawer pulls, door handles, cabinet tops and mirrors, as these details contribute to the cabinet‘s aesthetic and style.

Add another coat if the paint looks patchy and let it dry overnight. After letting the first layer dry overnight, you may notice that the paint has some patchy areas. Apply a second coat, brushing on paint over edges and corners and using a foam roller on flat surfaces. Let the vanity and all of the painted pieces sit undisturbed for a full night and check them in the morning.

Patchiness often occurs with darker paint colors. When applying extra coats of paint, you may need to let the vanity dry for up to 48 hours. Rinse the product away. Use warm water to clear away the chemical you used. Use a once-a-month cleaner. Products such as Scrubbing Bubbles Mega Shower Cleaner are meant to deep clean your shower once a month. To use, apply the product to the tub and walls. Leave it on for 3 minutes. Wash away the product.

Ensure the room is ventilated. Open a window. Keep the bathroom door open. Run a fan. Do what you need to do to create good airflow. Apply the sealer with an applicator brush or sponge. Put some sealer on the applicator, and work it into the grout. Only do a small area, so you can keep track of what you’ve done. In about 10 minutes, wipe off any excess. You need to remove the excess sealer from the tile and grout. The sealer should have soaked in during this time.

How Cleaning the Bathtub Naturally?

Wash away any grit and hair. Use your shower to wash away any debris in the way. If you have a removable shower head, use it to spray around the tub. Otherwise, use a cup or small bucket to pour water around. If you have a lot of hair and debris in your tub, it’s best to wipe it away with a paper towel before you rinse the tub using your shower head. Otherwise, you may accidentally clog up your drain.

Try a grapefruit and salt scrub. The acid from the grapefruit combined with the abrasiveness of the salt helps to scrub away grime. Plus, the grapefruit leaves your bathroom smelling like citrus. Cut a grapefruit in half. Cover the open half with salt. Sprinkle salt on the wet tub.

Scrub the tub with the grapefruit, releasing juice as you go. You may need to switch to another half to scrub away all the grime in your bathtub. You may even need more than one grapefruit. Rinse away any salt and pulp.

Create a bathtub and sink scrub. You may already have the ingredients in your home, especially if you like organic soaps. Mix 1 cup of baking soda with 1/2 cup of Castile soap and a few drops of peppermint or tea tree essential oil. Use the mixture on a sponge to scrub down your tub. It works especially well on soap scum. Rinse it away when your tub is clean.

Make a vinegar spray. Vinegar is slightly acidic, so it can help remove bacteria and stains. In a clean spray bottle, add 1 cup of vinegar and 1 cup of water. Shake vigorously. Spray it on your tub. Use a sponge to scrub it down. Rinse away the vinegar.

How Maintaining Your New Vanity?

Reassemble the vanity after it’s dry. When all the pieces are dry, you can remove the painter’s tape and reassemble the vanity pieces with the hardware you stored. Re-stock it with your products, and then it’s ready to be used!

Take the opportunity to do some spring cleaning. As you’re putting items back into the vanity, think about how often you use them. If you’ve barely or never used them, get rid of them to make more space inside your new vanity.

Revamp the hardware to give the vanity a whole new look. Switch out your drawer and cabinet handles for new hardware. Try hardware in a different metal, glass knobs, or handles instead of knobs. This will complete the vanity’s transformation and make it feel brand-new.

Patch up scratches by gently sanding and painting over them. Use a very fine grit sandpaper to lightly sand the chipped area. Then use a brush with the same paint that’s already on the vanity and paint over the scratch.

Try to fill the scratch in with the paint so it looks level with the rest of the surface. Let the paint dry for a few minutes, and the vanity should look as good as new. Very fine sandpaper includes grits of 240, 320 and 400.

How Cleaning Your Shower Head?

Pour white vinegar in a gallon-sized plastic storage bag. The amount of vinegar that you need will depend on how big your shower head is. You need just enough vinegar to cover the end of the shower head where the water sprays out. You can use any plastic bag, but a storage bag is more likely to be leak-proof. Clean your shower head once a month to keep your water flowing well and to prevent mildew.

Place your shower head in the bag. Make sure that your shower head is submerged in the vinegar. If you need to, remove the bag and add more vinegar to cover the spray area. Tie a large rubber band around the end of the bag. Place your rubber band above the shower head so that the bag stays in place while allowing the shower head to fully soak in the vinegar. If you don’t have a rubber band, you can tie off your bag with anything that will hold it in place.

Remove the bag in the morning. Let your shower head soak in the vinegar overnight. In the morning, pour the vinegar down the drain and throw away or recycle the bag. Run clean water through your shower head. Turn on your shower and make sure that the shower head is spraying at full capacity. Wait a minute before getting in the shower to ensure that the vinegar is fully washed away.

Rinse off the shower door. Use your cup or bucket to wet the shower door. This pre-rinse should also remove any debris. Rinse the door weekly between deep cleanings. Deep clean the shower door once a month. Apply a cleaner. You can use a commercial product, or you can mix a tablespoon (15 milliliters) of white vinegar into a cup (237 milliliters) of baking soda to use as a natural cleaning agent. Coat the shower door in your cleaner. Set a timer for 1 hour. Your cleaner needs time to set. While you wait, you can clean another part of your shower if you’d like.

Wipe away the cleaning agent with a soft cloth. Be careful not to use a brush or wire scrubber on a shower door, which can easily scratch. Choose a soft cloth, such as microfiber, to remove the cleaner and grime. Rinse the door with clean water. Cleanse the door until there is no more cleaning agent. Dry the door with a soft cloth. Use a clean cloth to remove the excess water. This will prevent streaking on your newly clean door.