Posts

How to Removing the Old Faucet?

Disconnect the supply tubes. These are the tubes that connect the faucet to the water supply. Use the adjustable wrench to loosen the nuts where the hoses attach to the water supply. Use the basin wrench to loosen the nut attaching the hoses to the faucet. Turn the nuts to the left (counterclockwise) to loosen them. Once you’ve loosened the nuts with the wrenches, you can remove them the rest of the way by hand. Wipe up any water that drips onto the bottom of the vanity immediately to prevent damage or warping.

Loosen the lock nuts to take out the old faucet. Most faucets are attached to the sink by locknuts attached to the tailpieces under the sink. Use your hands or an adjustable wrench to loosen the nuts and unthread them from the tailpieces. Turn them to the left (counterclockwise) to loosen them. Remove the nuts and the washers from the tailpieces. Once you’ve removed the supply lines, nuts, and washers, the faucet will be loose. Hold the faucet in both hands and pull it straight out from the mounting holes. Remove the gasket if there is one and set it aside with the faucet. Use the flashlight to locate the nuts under the sink if you’re having trouble locating them.

Scrub the faucet holes. With a sponge or gentle abrasive pad, scrub the mounting holes around the sink where the faucet sits. Use soap and water or your favorite cleaner or detergent. Once the area is clean, rinse it well, pat it dry, and let it air dry completely. To remove old sealant or silicone, dampen a sponge or rag with mineral spirits and wipe the area clean. Then rinse the area with clean water and pat it dry.

Determine what kind of faucet you have. Once you’ve removed the old faucet from the mounting holes, you can figure out what hole configuration you’re working with and the type of faucet you need. There are three major types of faucets:

Single hole, where the sink will only have one hole for the faucet, and the faucet will all be one simple piece with a single handle. Center-set, where there will be three holes in the sink and the one-piece faucet will have separate handles controlling the hot and cold water. Widespread or split-set, which work with three-hole basins, but the spout and two handles come in three separate pieces.

Purchase a new faucet. Before you go to the home or hardware store for a new faucet, determine the type of faucet you have, look at your basin hole configuration, and measure the distance between the holes so that you get the right replacement faucet. Write down the number of holes your basin has, the type of faucet that was on there, and the distance between the holes. If you want to replace your old faucet with a new kind, you’ll have to replace the basin as well.

What Should We Do Before Replace a Bathroom Faucet?

A new faucet is a great way to update your bathroom and give it a whole new look. Whether you are renovating the bathroom or need to replace an old or leaky faucet, this is a relatively simple DIY project that you can accomplish in a few hours. The important thing is to get a faucet that fits your sink, so you should remove the original faucet before purchasing a replacement.

Gather your tools and supplies. Replacing a bathroom faucet is a straightforward job, but it does require a few tools that you’ll need to remove the old faucet and install the new one. The tools you’ll need include: Adjustable wrench, Basin wrench, Bucket, Towel, Flashlight, Measuring tape, Plumber’s tape, Sponge or scrubber, Bathroom cleaner or soap, Rag or cloth, New faucet (purchased after you remove the original)

Prepare your work area. Remove everything from underneath the sink. Place a towel below the pipes to protect the vanity from water damage. Place a bucket over the towel and under the faucet to catch any water that drips down. You can also lay a garbage bag down under the towel for even more protection, or in place of the bucket.

Turn off the water. Locate the water shutoff valve for the bathroom sink. It should be under the sink, inside the vanity. Turn the valve to the right (clockwise) to close the valve and shut off the water to the faucet.

Depending on your plumbing, you may have a single water valve for the entire faucet, or you may have two separate valves for the hot and cold water. If you have trouble locating the shutoff valve, you can turn off the water supply to the entire line running to the bathroom sink.

Drain the water. To remove excess water from the faucet and to relieve pressure before you start working, drain the pipes after you shut off the water. Turn on all the faucets at the sink and keep them running until all the water has drained out. This will protect your sink, vanity, and floors from leaks and water damage, and prevent water from spraying everywhere when you remove the faucet.


How to Decorate a Small Bathroom?

Sprucing up a small, dull-looking bathroom can make an apartment or home feel more comfortable and polished. Whether you want to tear out the tile and get new bathroom fixtures or you’re just looking for ways to bring some life to the room, here are tricks you can employ to make your bathroom seem more spacious and pleasant.

Make use of your bathroom‘s natural light. Even a small bathroom can be a peaceful, relaxing getaway in your home if it gets good natural light. If possible, don’t cover up your windows with dark curtains or blinds. Install curtains or blinds in a light color like oatmeal or cream; make sure they’re thick enough to provide a secure screen, but thin enough to let some light in. You could also install curtains that cover only the bottom half of your windows, letting light in through the top half. If your bathroom is situated away from other people’s view, go ahead and open the curtains or blinds to let the light shine in.

Replace yellowish ceiling lights. If you have an old-fashioned, dull yellow ceiling light – which many bathrooms do – a simple way to transform your bathroom is to update the light fixture with something more modern. Choose a light covering that helps bath the bathroom in white light, rather than yellow, which causes rooms to look gloomy and small. A small chandelier is a good choice for a tiny bathroom; it adds elegance without taking up too much space. Track lighting can also help give the appearance of a bigger space.
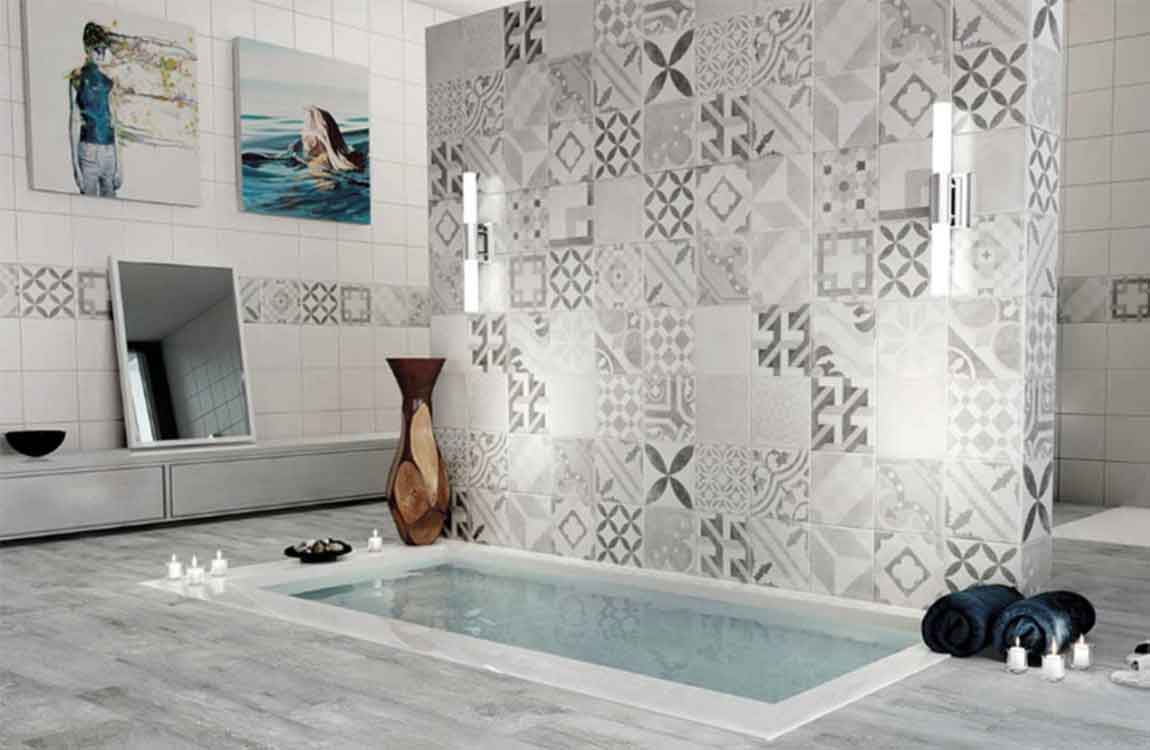
Choose paint colors wisely. Painting a room with highly contrasting color can make it look smaller, so choose paint that isn’t too wildly different from your bathroom tiles. For example, if you have cream tile, painting the walls dark blue might make the space feel claustrophobic; go for a lighter shade of cream, peach, pale blue, or another color that isn’t too loud.

If you prefer bolder colors, consider painting the walls a neutral color and adding a more colorful trim or border. You could also paint just one wall a bold color and leave three walls neutral, or use wallpaper in one area and neutral paint everywhere else.

How to Caulk a Bathroom Sink?

Drop-in sinks are made to hang from the top of a counter by their rims. While these rims appear to sit flush to the counter, there is actually a small gap between the rim and counter where water and debris can collect. Caulk fills this gap to make your counter and sink watertight, while helping to eliminate any movement of the rim of the sink. To help prevent leaks or damage to your counter, seal and fill this gap with waterproof caulk whenever the old caulk begins to crack, discolor or peel.

Wipe a clean cloth around the edge of the bathroom sink and the counter it rests on. Make sure the area is clean and dry and has no dust or debris to get in the way of the caulk. Remove any old caulk from the edge of the sink with a utility knife. Caulk is a soft material that cuts easily and stretches when pulled.
Cut away the old caulk where it meets the counter and the sink‘s rim. Pull the caulk free from the sink and counter. Use denatured alcohol to clean up any leftover caulk. Let the sink‘s rim dry completely and ensure no water has seeped into the crack. Use a utility knife to cut the tip off the tube of caulk at a 45-degree angle. Cut just enough of the tip off to allow the caulk to fill the gap next to the rim; cutting away too much of the tip will mean too much caulk on your counter.

Insert the end of the caulk tube into a caulk gun and push the plunger of the gun into the back of the tube. Squeeze the trigger lightly to prime the tube. Hold the caulk tube at a 45-degree angle to the sink‘s rim where it meets the counter top. Squeeze the caulk tube gently until a continuous line of caulk fills the gap around the rim completely.

Wet your index finger with water and gently smooth the caulk against the side of the sink‘s rim and the counter top to completely seal the gap. When you are happy with the results, insert a small screw into the tip to seal the tube of caulk, so you can use it again in your next project. Let the caulk cure for at least 24 hours before using the sink.

How to Organize Bathroom Cabinets

Keeping your bathroom cabinets neat and orderly can be a challenge. And given the importance of the morning preparation that commonly starts the average day, knowing where to find things is a huge help. Luckily, by following a few simple organization tips, you can take charge of the messy state of your bathroom cabinets and keep your belongings as accessible as possible.

Place a spinning turntable into your deep cabinets for easy access. Also known as a Lazy Susan, these can make hard-to-reach items more accessible. Place some glass jars onto the turntable and label them with their contents. Cotton swabs, bath salts, cleaning wipes, and other products that come in bulk amounts are ideal for jars.

Cut out labels from a decal sheet and spell out the categories using adhesive letters. Conceal utilitarian items using wicker baskets for better aesthetic. Although these containers work for any kind of product, they’re ideal for items that you don’t want to display, like extra tissue paper stock. You can label each one by fixing paper tag labels to each basket with string.

Install an extra curtain rod for towels. Position it under your current curtain rod and give yourself 2 to 3 inches (5.1 to 7.6 cm) of space in-between. This is a prefect way avoid wet towels cluttering up your bathroom. Mount the towel bar behind the curtain so that your towels can drip-dry into the tub.

How To Planning the Bathroom Design and Budget

Decide how you want the bathroom to look like. Think about what mood, theme, and color scheme you want. This is also a good time to think about new faucets, towel rods, door knobs, tiles, and so forth. Great places to get ideas include websites such as Pinterest and home design magazines. Be sure to save pictures of bathrooms you like.

Go with a theme, such as country or ocean. Write down things that might go with that theme, such as rustic wood, lavender, lighthouses, or starfish. Go with a color scheme, such as all blues or all greens. Go with a limited, modern look or an ornate, old-fashioned look.

Plan a budget. The more you plan on doing to your bathroom, the more money you will have to spend. Something simple as changing out a light bulb or faucet probably won’t be very expensive. Things such as adding a shower, or removing a wall, however, may require a higher budget.

Just because something is out of your budget does not mean that you should abandon your design. You could always go for a cheaper item that looks similar, or buy the item when it goes on sale. Many hardware stores also offer promotions and coupons.

Think about how much work needs to be done, and what sort of work. There are different types of renovations, and each requires a different amount of work, time, and money. Some renovations may also require the aid of a trained professional, for which you will need to hire a contractor.

Simple renovations include things like painting the walls, adding faucets, or changing the towel rack and lights. This sort of work can be done by anyone, and won’t take very long. Complex renovations include things like removing or adding walls, replacing bathtubs, adding a shower, or moving a toilet to another spot. These sorts of renovations require a contractor to do the work for you, and may require some time to complete.

Decide how much time and effort your want to spend on your bathroom. Things like switching out old light bulbs for new ones won’t take that much time or effort. Changing a bathtub or moving a toilet also won’t take much work from you, because they will be completed by a trained professional instead. Painting and adding new tiles, however, may take a lot of time and effort, especially if you choose to do the work yourself. For example, paint needs time to dry, and tiles need to be laid out in grout. This may also affect your budget.

You can do most of the work yourself, but it will take a lot of time and effort. It will, however, be much cheaper than hiring someone to do it for you. You can also hire a professional instead. This may cost you more money, but you won’t have to lift a finger or get dirty. Most professionals get their work completely quickly, because they have done it many times before. Just because a bathroom is small does not mean that it will be finished sooner. If you need to order supplies, such as tiles, a small bathroom can take just as much time as a large bathroom.

Consider asking a professional designer for help. If you don’t know where to begin when it comes to design work, you could hire an architect or interior designer to design a bathroom for you. He or she will know how to work with different colors and materials to create something visually pleasing. The architect or designer will also know how to place things in your bathroom to make them more efficient.

Know when you need to hire a contractor or trained professionals. If you need to do anything to the plumbing or electrical wires, you will need to hire a contractor. He or she will then take care of hiring workers, salaries, working hours, and so forth.

How to Organize Your Bathroom?

It can be difficult to find what you need when your bathroom is cluttered. Organizing by type of product and using storage bins to keep similar items together can help you find what you’re looking for easily. Spending a few minutes each day to tidy up the bathroom will also prevent you from having to a do a major overhaul after this initial cleaning.

Remove all items from your bathroom. This includes items from the shower, counters, cabinets, and closets. Lay everything out on a flat surface or floor so you can see what you have. Sort items by type. For example: makeup, shampoo/conditioner, hair products, shaving products, soaps, lotions, medicine, first aid, oral hygiene, cleaning supplies, and anything else you happen to have. Throw away anything you don’t use. If you haven’t used it in a year, trash it. Throw away empty bottles or duplicates of stuff. This includes all expired products, including prescription and over-the-counter medicines.

Designate a storage bin for each category. Label each bin: prescriptions, over-the-counter medicines, first aid, soaps, hair products, lotion, shaving products, etc. Clear bins are best, as you will easily be able to see exactly what is inside them. Fill the bins. Keep similar items together. Small items can be grouped in plastic bags before added to the bins. Make a few first aid kits by category – minor scrape, sprain, major cut, etc. This helps you avoid having to weed through a large box of stuff for a bandage. Separate the medications by type (allergy, cold and flu, headache, etc.) and store them in small containers. Place barrettes on a decorative strand of ribbon. Keep bobby pins together by attaching them to a magnetic strip. Use a metal file box to hold hair irons. Keep a basket just for the samples you receive so you can put it out for guests to use.

Clean your bathroom thoroughly. Before you put the items back, clean the shower and tub, sink and counters, mirrors, toilet, and floors. Any room is much easier to clean when empty, and you’ll have your bathroom sparkling in a flash. Decide what will go where. Don’t replace any of your items yet. Just look at the bins you filled and decide where the best spot for each one is. Things you use every day should go in the bathroom closet and things you rarely use like extra shampoo or soap should go under the sink. Put towels and extra toilet paper on a shelf in the bathroom closet. Use organizers on the backs of the cabinet or closet doors to maximize your space. Fill them up with bottles, tub toys, and so on. Use a cutlery tray or a desk organizer in the drawer to organize your makeup.

Label the shelves in the closet and the medicine cabinet. This will make it easier to find and put away items and to know when an item needs replaced. Store only what you use often in the bathroom. Keep the excess in an overflow space. This goes for items like barrettes, too. If you have too many, place some in a plastic bag and tuck them away for future use so you can shop at home when you need more.

bathroom installation of these sanitary ware to enhance your quality of life

Bathroom Installation Of These Sanitary Ware To Enhance Your Quality Of Life

bathroom installation of these sanitary ware to enhance your quality of life
1, pull type basin faucet

Do not know if you have this experience, when you want to separate the hair on the basin faucet fixed, very convenient to use, not always hit the head, neck and the key to long, very tired. The biggest advantage of this design and drawing in the basin faucet is the leading pull it out. Whether wash or cleaning the pool, water can be rushed to the washing, no dead. In addition, this faucet is suitable for all sinks, and it is also very convenient to install.

2, intelligent toilet

The most basic function is the intelligent toilet flushing, drying, deodorizing, automatic washer insulation, toilet although the price is not cheap, but if you really use the smart toilet, you can understand why so many people on the intelligent toilet in droves, because I really enjoy, and the convenience.
If your economic conditions permit, you can install one! If you’re not going to install an intelligent toilet for the time being, then you’re advised to reserve a socket on the back wall of the toilet. If you want to change the smart toilet, you don’t need to pull the wire alone!