How Installing the New Tub?


Slide the new tub in place so the flanges rest on the ledger boards. Have a partner help you slide your new tub into place. Feed the drain shoe into the hole in the floor, and set the rest of the tub down. Make sure the tub is level one more time before securing it to the wall. Make sure the tub is in full contact with the floor so the ledger boards aren’t supporting the full weight.


Screw or nail the tub into the studs. Use screws or nails that are 2–3 in (5.1–7.6 cm) long to secure the tub flange to the the studs. Work slowly so you don’t accidentally crack your tub. Put 1 nail or screw into each stud to keep it in place. Tip: If there are any gaps between the studs and the tub flange that are 1⁄8 in (0.32 cm) or larger, put wooden shims in before you put in nails or screws.


Use hardwood shims since soft wood can deform over time. Connect the drain shoe to the pipes. Access your pipes from the hole you cut in the room adjacent to your bathtub. Use a pipe wrench to tighten the drain shoe to the P-trap until it’s completely secure. Squeeze a ring of silicone sealant around the pipe and P-trap for another layer of protection from leaks.


Reattach the faucet. If the faucet had a screw, put the faucet back on with a screwdriver and turn it clockwise. If the faucet screwed off by itself, twist it back on by hand and use a pipe wrench to secure the faucet in place completely.


Fill the tub and test for leaks the day after it’s installed. Let the sealant on your tub dry for 1 day so it’s completely set. Turn the water valve back on and let it fill the tub. Listen for any dripping noises and watch for any noticeable leaks near your drain or on your pipes. If you find any leaks, use more sealant around the leaking area.

How to Clean a Ceramic Sink Without Chemicals?


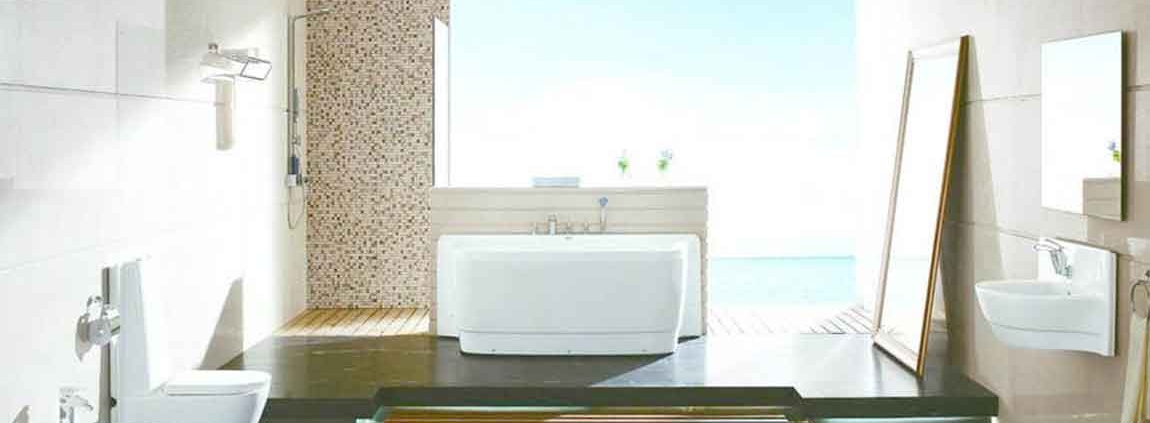
Ceramic sinks are delicate, and can easily become scratched or stained if not cared for properly. You can save money – and your sink – by using gentle cleansers made from household ingredients. Remove stains using a mild acid like lemon juice or vinegar. For extremely stubborn buildup, use baking soda as an abrasive cleanser. Keep your sink clean by regularly washing it with a sponge and a gentle detergent.


Regularly wash your sink with soap and water. You can prevent dirt and stains from building up in the first place by gently washing your sink after every use. Use a little dish soap and a soft, non-abrasive sponge, and rinse thoroughly with clean water. Wipe down your sink with lemon oil. Lemon oil will help keep your sink smelling fresh, and give it a beautiful sheen.


The oil also protects your sink from stains and dirty buildup. Apply a little lemon oil after your regular cleaning. Avoid leaving anything staining in your sink overnight. Coffee grounds, tea bags, wine, and other dark or staining substances can leave permanent or hard-to-remove marks on your sink. Prevent stains by quickly removing anything that could mark your sink, and rinsing thoroughly after exposure.


Use an electric screwdriver or the back of your claw hammer to remove the screws or nails from the flange. Make sure to check each stud around your bath for any nails. Some older tubs may not be nailed or screwed into the wall. Cut any caulk holding the tub the to floor. Run a razor knife through the caulk or sealant surrounding your tub.


Cut through the line of sealant that connects the apron, or front of your tub, to the floor. Lift the tub out of place with a partner’s help. Grab the tub from the side opposite of the drain and lift it out from its place. Have a partner help slide the tub backward away from the drain pipes. Stand the tub upright and work together to carry it out from your bathroom.

How to Replace a Bathtub?


If you have a bathtub that’s cracked, worn out, or not your style, you can tear out the old tub and install a new one to update your bathroom. Replacing your tub involves plumbing and carpentry skills, but with the right tools you can do it on your own or with a partner. After disconnecting the drains and pulling out the tub, all you need to do is level the floor and slide the new tub into place. With a little work, you can install a new and updated bathtub in the span of a weekend!


Drain removers can be bought from your local hardware store. Some tub drains have screens that you need to remove with a screwdriver before you can use the remover tool. Take out the drain shoe from the access panel you cut. The drain shoe is made up of the pipes that connect the overflow and the main drain to your tub.


Look for the T-shaped connector holding the pipes together, and use a pipe wrench to twist the drain shoe off of the main pipes. If the joint is stuck or won’t come out with a pipe wrench, cut through the pipes with a reciprocating saw or hacksaw.


Remove the tub surround and drywall around your tub. The surround is the tile or fiberglass on the walls around your tub. Use a pry bar or the back of a claw hammer to rip the surround away from your tub. When you reach the drywall, use a razor knife to cut out the area around that extends 6 inches (15 cm) from the top of your tub until the studs are exposed.


Wear safety glasses, work gloves, and a respirator to keep yourself protected. If your tub has a surround panel made from fiberglass, you need to take out the entire piece in order to install a new bathtub. Pull out the nails or screws connecting the tub flange to the studs. The flange around your tub is the raised edge that keeps water from draining into your walls.

How Leveling and Prepping Your Work Area?


Purchase a tub that matches the size and layout of your old one. Measure the size of the alcove and note the drain direction. Use a tape measure to find the maximum length and width of the alcove. Note whether your drain is on the left, right, or center of the tub Find a tub from your local home store that fits in the alcove and has a drain in the same place.


Most standard tubs are about 5 feet (1.5 m) long and 2 1⁄2 feet (0.76 m) wide.
Common Types of Bathtubs: Acrylic and fiberglass tubs are the cheapest and the easiest to maneuver due to their light weight. Cast-iron tubs are durable and hold heat longer, but they are heavier and difficult to maneuver.


Level the floor with an underlayment if it’s not already flat. Underlayment is a thin layer of concrete that smooths the surface of your floor. Check your floor with a level to see if it sits flat. If not, mix the underlayment following the package instructions and spread it across your floor with a flat trowel. Smooth the surface and allow it to dry for 1 day so it has time to set.


Applying a layer of underlayment allows you to remove the tub easier if you need to fix any plumbing issues. Underlayment can be purchased from your local hardware store. Fit the new tub into the alcove and mark the height of the flanges. Set your new tub into the opening where the old one used to be. Make sure your tub sits level on the floor.


Use a pencil or marker to trace a line on your studs at the same height as the flanges on your tub. Once you have each stud marked, take the tub out from the alcove again. If the tub isn’t level, place hardwood shims underneath it until it sits flat. Attach ledger boards to the studs below your flange marks. Nail or screw 2 in × 4 in (5.1 cm × 10.2 cm) boards so the top edge is even with the marks you drew on the studs. Use flat, straight boards that are the same length as the sides of your tub.

How Removing Your Existing Tub?


Cut a panel behind your tub to access the drain pipes. Most times, the water supply valve for your tub is located in the walls behind the faucet. Go into the room adjacent to your bathroom to cut a hole in the wall where the drain and faucets are for your tub. Use a stud finder so you don’t accidentally cut into one of the studs. Cut an 8 in × 8 in (20 cm × 20 cm) square in the drywall with a reciprocating saw to expose the pipes.


If you can’t access the room adjacent to the drain, cut a hole in the floor beneath the bathroom using a reciprocating saw. Make sure you’re underneath where the tub drains. Wear safety glasses while working with your saw. Turn off the water supply to your bathroom. The water supply for your tub is either controlled by a valve in the wall behind your faucet or by the main water pump. Turn the valve so it’s perpendicular to the pipes to turn it off.


If your valve shut-off is circular, look for the directions printed on the valve head to figure out which way to turn it. If you cannot turn off the water for your tub or bathroom, you may need to turn it off for the entire home or building.


Remove the tub spout. Locate the screw on the underside of the faucet or where it connects to the wall. Use a flathead or Phillips screwdriver to remove the screw. If it doesn’t have a screw, tighten the jaws of a pipe wrench around the back of the faucet and twist it counterclockwise until it’s loose. Then, pull it out. If you want to save the faucet, put a rag in between it and the wrench so you don’t leave any scratches.


Take out the main and overflow drains. A drain removal tool is a cylinder that fits into the drain to loosen its connection to the pipes. Put the end of a drain remover tool in the drain hole and turn it counterclockwise. Keep turning the tool until the drain is loose and you can pull it out by hand. Unscrew the overflow drain, located on the front wall of your tub, and pull it off of the surface.

How Removing Stubborn Buildup with Baking Soda?


Use baking soda as a last resort. Although it is very mild compared to other abrasive cleansers, baking soda (sodium bicarbonate) can still scratch up your sink. Use it only if you can’t take off the dirt with soap and water or lemon juice.


Apply baking soda to dirty areas with a shaker. You can use a repurposed sugar shaker, or make your own shaker by punching a few holes in the lid of a jar. Shake on a generous quantity of baking soda. Make sure the sink is only slightly damp when you apply the baking soda. Baking soda dissolves quickly in water, which makes it ineffective as an abrasive.


Use enough water to make a paste. If you don’t mix in enough water to make a baking soda paste, the cleaner won’t work. The paste requires the power of scrubbing just as much as it does the power of baking soda.


Carefully scrub with a sponge. Use a slightly damp (not soaking wet) scrubber to gently rub away the dirt. The baking soda should form small clumps that take the dirt with them as they come up. Use a non-scratch scrubbing sponge. Avoid steel wool or pumice stones for this purpose, as both can do a lot of damage to ceramic or porcelain sinks.


Rinse away the baking soda. Run some cold water into the sink and rinse away any remaining dirt and baking soda. Wipe down with a clean, dry towel or rag. Attach the grille. Return to the bathroom and install the motor blower assembly by plugging it into the receptacle and screwing to secure. Attach the decorative plastic grille, then turn the power back on to test if your new bathroom fan is working.

How Removing Stains with Lemon Juice or Vinegar?


Apply lemon juice or vinegar to any stained areas. These mild acids are especially effective at removing rust stains. If you use lemon, you can either squeeze the juice onto the stain or gently rub the stain with a lemon wedge. Alternatively, pour a little white vinegar on the stain.


Allow the cleanser to sit for a while. While lemon juice and vinegar are both fairly gentle, they should not be left sitting on your ceramic for too long. Allow the stained area to soak only as long as necessary, or you might risk etching the surface or your sink, which will make it harder to clean in the future.


Try wiping the stained area with a gentle sponge or cloth after half an hour or so to see if the stain is ready to come off. Wipe down the stained surface. Don’t use anything too abrasive. The soft side of a kitchen sponge or a washrag should work for this purpose. While it may be tempting to reach for a Magic Eraser, melamine sponges actually work like a very fine-grained sandpaper, and can scratch up your sink.


Rinse thoroughly. After using any kind of acidic cleanser on your sink, you should carefully rinse it away with water. Make sure there isn’t any residual lemon juice or vinegar sitting in your sink, gradually eating away at the ceramic.


Pull the end of the duct pipe through the hole until 3⁄4 inch (1.9 cm) extends beyond the edge of the roof or sidewall. Secure in place with sheet metal screws and seal around the edges with caulk. Secure the new vent cap over the end of the duct pipe. If the vent pipe is on the roof, replace any shingles that may have come loose.

How to Clean a Ceramic Sink?


Ceramic sinks are common fixtures in bathrooms and kitchens, and are generally durable. However, they will become soiled and stained with regular use, and will need to be cleaned regular. You can do this using a mild abrasive like baking soda, or a more potent chemical like bleach. Plan to clean your ceramic sink monthly, to avoid stains and other dirty buildup.


You’ll need to use at least four or five lemon slices to fully coat the ceramic with lemon juice. Let the lemon juice sit for 30 minutes. Once the ceramic is covered with lemon juice, let it sit for 30 minutes. This will give the natural acidity of the lemon juice time to break down stains. Once the lemon juice has set for half an hour, come back and rinse the sink out.


Throw away the remnants of the lemon rinds, or grind them up in your kitchen sink’s garbage disposal. Connect the wiring. Insert the electrical cable through the new fans connector and secure it with a cable clamp. Open up the electrical splice box (from either the attic or the bathroom, depending on the model) and pull out the fan wires.


Attach the electrical wires to the fan wires by twisting same color wires together (white to white and black or red to black) and attaching a wire connector. Wrap the bare copper wire under the ground clip or screw and tighten to secure. Tuck all of the wires back into the electrical splice box and replace the cover.


Complete the outdoor work. If you replaced your old duct pipe with a newer, bigger pipe, you will also need to install a larger vent cap on your roof or sidewall. Take whatever safety precautions are necessary for working at a height. Remove the old vent cap and use a saw to enlarge the opening to the size of the new duct pipe.

Protecting Your Sink from Scratches or Damages


Wash the sink with a soft sponge. Although ceramic is a tough, durable material, it can still be damaged if scrubbed with an abrasive material. Do not use scouring pads to clean your ceramic sink, especially any pads made of wire or metal. Also do not use scouring powders to clean your ceramic sink, as they could scratch or damage the surface. Instead of these, clean the sink with a soft, non-abrasive sponge.


Some cleaning companies manufacture scouring liquids. Also avoid using these on the ceramic sink. Clean with a gentle, ceramic-specific product. Do not use concentrated drain cleaners in your ceramic sink. Although these products are advertised as being safe on all surfaces, a chemically potent concentrated drain cleaner may damage or erode the surface of your ceramic sink.


If you would like to use a drain cleaner, look for a gentler cleanser that is specifically designed for use on ceramic or porcelain. You may be more likely to find such a drain cleaner at a health store or a natural foods store.


Wash dishes in the sink or in a metal container. Be careful to avoid washing dishes in large plastic bowls. Although the plastic bowls themselves will not harm the ceramic, the bowls will likely accumulate grit and dirt on their bottoms through normal use. This grit can scratch the surface of the ceramic on the bottom of your sink, and these scratches cannot be removed.


When you wash dishes, either fill the sink itself with soapy water, or find a large vessel that will not collect grit on its bottom. For example, use a large metal saucepan.

How Removing Stains from the Ceramic Sink?


Soak the sink with a bleach solution. In an empty plastic spray bottle, combine a 1:1 solution of bleach and water. Lightly shake the bottle to mix the solution. Open the window or turn on your bathroom fan before you start spraying the bleach solution, as this will provide ventilation. Then, spray the bleach solution over the entire interior surface of the ceramic sink. Let the bleach mixture sit and soak for about 10 minutes. Then, use a sponge or an old rag to wipe the sink clean.


Bleach is a strong chemical and can be very harmful if ingested or sprayed in the eyes. Use caution when spraying bleach, consider wearing safety goggles or at least rubber gloves, and wear clothing that you don’t care about. If there are young children in your house, make sure that they’re not near the sink when you’re spraying bleach.


Apply cream of tartar and vinegar. If you would prefer to not use any chemical cleaners, you can remove stains from the ceramic with a mixture of cream of tartar and vinegar. Combine the cream of tartar and the vinegar at a 1:1 ratio in a small mixing bowl, and stir them together. Then, spoon some of the mixture onto the stains on your ceramic. Let this sit for about 10 minutes, and wipe clean with a sponge.


This method will also work if you substitute hydrogen peroxide for the vinegar. All three of these ingredients can be purchased at your local grocery store or supermarket. Scrub the stain gently with a pumice stone. Pumice stone is quite abrasive and can scrub stains off of your ceramic. Before using, run the pumice under water, and make sure that the stone stays wet while you’re rubbing out a stain. Then, lightly scrub at the stained area of your ceramic sink. The pumice should remove the discoloration.


Be careful when using this method. If you apply a pumice stone to a ceramic sink, the stone may scratch or damage the surface. Begin by rubbing gently, and stop if you see any scratches forming.