How to Adding Extra Wall Storage?

Add wall shelving. On any open wall spaces, add sturdy shelves that match the style of your bathroom. If you need the extra space, go all the way up to the ceiling. You can even use the space directly above the door. Place items more frequently used on the lower shelves. If you can’t reach the higher shelves, store a stepstool in front of the bathroom cabinet.

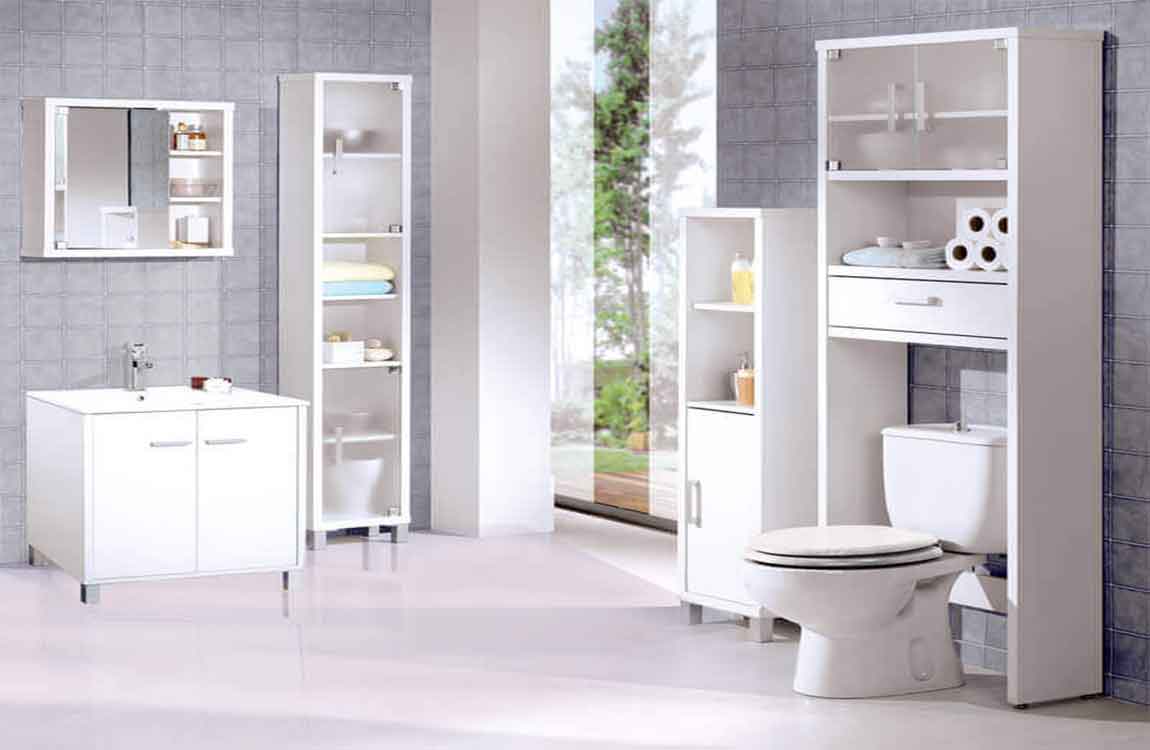
Add floating shelves above the toilet. Most people ignore the space above the toilet, but this is actually valuable real estate for storage. A standing rack can look bulky and outdated. However, if you hang a set of floating shelves in a complementary color to the wall, then this will actually open up the space. Stack decorative items on these shelves or use them for extra toiletry storage for items, such as toilet paper and tissues.

Hang glass jars on the wall. Get a set of clean, large mason jars. Use metal loops or small shelves to keep them suspended on the wall. Once the jars are secured, fill them with small items, such as makeup tools. Keep the design looking even cleaner by putting the same type of items into each jar. For example, 1 jar can just hold brushes. Another can hold cotton swabs and so on. 

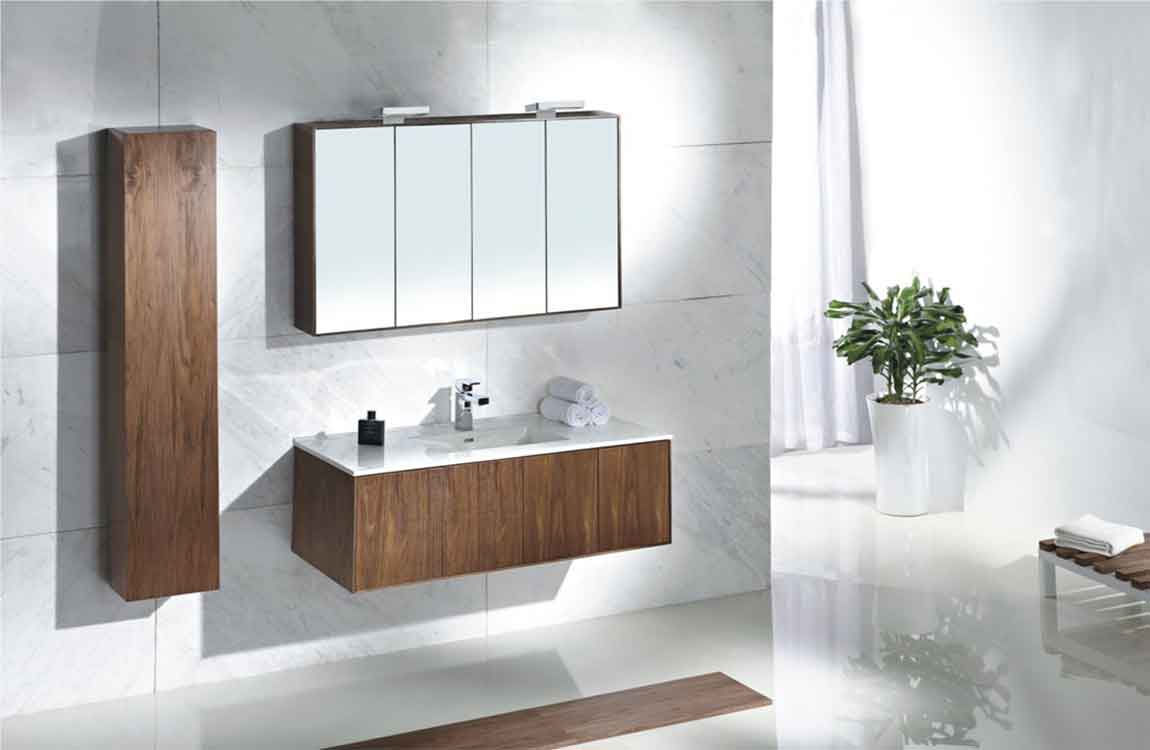
Place magnetic strips around the vanity. Buy long, metal magnetic strips from your local hardware store. Use screws or construction glue to secure these strips to any gaps on the walls around the sink and vanity. Then, hang metal items, such as tweezers, on these strips. This is also a great way to secure small metal items that you might otherwise misplace, such as bobby pins. Don’t place any sharp objects on the strips in the slight chance that they could fall off and cause an injury.

Use spice racks for makeup storage. Spice racks are great for storage because they are the perfect size for makeup or even medicine bottles. They are also easy to wipe down for cleaning. In the empty wall space near the sink, hang a set of spice racks using screws. Make sure that the racks are close enough together to maximize your wall space. However, don’t place them directly against one another or that might look overcrowded.

How to Organize a Small Bathroom?

With a bit of careful organizing, you can make a small bathroom feel spacious and tidy. Divide your cabinet space with storage containers and baskets. Make use of every inch of wall space by hanging floating shelves up to the ceiling and over the toilet. You can even add racks, rods, or more storage on the back of the door. Embrace creative storage options, like glass jars, for odds and ends.

Put a lazy susan in the cabinet. It can be easy for the bottles and small items inside your bathroom cabinets to get disorganized and tough to reach. Place a lazy susan towards the front of the cabinet where it is easily accessible. Set your extra shampoos, conditioners, lotions, or other products on it.

Install a styling tool holder inside your cabinet. The cords of blowdryers and curling irons can become a real problem under your cabinets and can knock over your toiletry items. You can buy a metal styling tool holder at a home goods store that will hang on the inside of your lower cabinet.

Install under-the-sink sliding drawers if you have deep cabinets. In the lower bathroom cabinets, secure drawers that will slide out when pulled. You can purchase these wooden, plastic, or metal drawers in the kitchen or bathroom remodeling sections of home renovation stores. Most of them will screw right into the existing cabinetry. Check to make sure that the drawers pull out smoothly. If they jostle or if you have to tug them, then the contents standing inside will likely fall over and cause a mess.

Install an under-the-sink organizer if you have a pedestal sink. You don’t have to waste the space under a pedestal sink. Instead, get a premade organizer that will fit around the bottom part of your sink from a home improvement store. These organizers usually just slide into place against the wall with a few mounting brackets to hold it steady.

Divide your drawers with plastic bins. Your drawers can get messy really quickly, as items shift around every time you pull them out. To keep everything in position, invest in a set of plastic organizers that fit tightly into the drawers. Ideally, find containers with both large and small openings to hold a variety of items. For example, you can put hair ties, cotton swabs, flossers, and other small items into the bathroom cabinet.

How to Paint Bathroom Cabinets for Painting the Perfect Finish?

Mix the paint. Make sure your paint is thoroughly blended and free of clumps or separation. You can do this with an electric drill with a paint paddle attachment if the paint has been sitting in storage for a while, or simply give it a stir if you’re just bringing it home. The better the paint is mixed, the smoother coverage it will create. Oil based paints may separate more than other varieties. Do your blending outside and set down a few sheets of newspaper or cardboard to protect from splatters.

Apply the base coat. Paint cracks, crevices and other hard to reach spaces first, using a brush to give you greater control. Afterwards, go over flat, broad surfaces using a dense foam roller. Let the initial coat set up for a couple of hours before applying subsequent coats. Don’t worry too much about making the first coat flawless. You can cover up any visible imperfections with later coats.

Paint additional coats as needed. Most cabinets will require two to three coats for a seamless finish. For the final coat, use a steady hand and a consistent brushing pattern. Watch out for drips, as these can permanently settle into the complete finish once it dries. When you’re done, the your cabinets should have a rich, uniform appearance.

Use your best judgment after applying the base coat to decide how many follow-up coats will be necessary. Many new types of paint are self-leveling, which means they won’t run or clot as easily. Working with these paints can save you a lot of frustration in achieving the perfect finish, as well as additional mess during cleanup.

Allow the paint to dry completely. The paint will dry to the touch within 24-48 hours, though it may take up to a week for it to harden to the point that it becomes resistant to scuffs and other marks. Leave the doors open to provide air flow. Keep small children and pets away from wet paint as it dries. Leaving the fan running in the bathroom may help the paint set up at a faster rate.

Replace the doors and hardware. Once the cabinets are dry, reassemble the doors, put all hardware back into place and enjoy the newfound beauty and relaxation of your bathroom. Make sure the paint dries completely before installing the hardware or it will adhere to the paint.

How to Sanding and Priming the Cabinets Before Paint Bathroom Cabinets?

Like any room in the house, the bathroom can benefit from a makeover every once in awhile. If you want to update the look of your bathroom but aren’t enthused about the idea of dropping an untold sum of money on new installations, consider simply repainting your cabinets or vanity. A fresh coat of paint can drastically change the appearance of your bathroom without the difficulty or expense that comes with extensive renovation. Simply pick a color, then line, prime and paint, and you’re guaranteed to develop a new appreciation for your cozy washroom overnight.

Clean the cabinets first. Before you sand, prime, or paint, you need to thoroughly clean the cabinets. Put on gloves and mix trisodium phosphate (TSP) and water according to the instructions on the box. Dip a sponge in the solution, wring it out, and wipe down each cabinet. Then, wipe down each cabinet with a clean cloth to remove any residue. Be sure to clean the inside and outside of each cabinet.

Remove all doors and hardware. Before you get started, take off the cabinet doors, pull out drawers and pop off false drawer plates. You’ll also want to unscrew any handles, pulls, stops or hinges that might get in the way while you’re painting. This way, you’ll be able to work without obstructions. Keep everything together in one place to avoid losing important pieces.

Labeling the individual bits of hardware or placing them in separate plastic bags can make it easier to keep track of everything. If you’d also like to use this project as a chance to install new hardware, this would be an opportune time. Sand the cabinets to remove existing paint. Go over the outside of the doors, panels and baseboards with a high-grit sandpaper. There’s no need to remove every trace of paint or lacquer—you just want to make the cabinet’s outer surfaces coarse enough for the primer to cling to. Work out any rough edges or irregularities and aim for a smooth finish.

Put on gloves and eye protection before sanding. Sand using smooth, circular motions, moving outward as you progress. Run the sandpaper straight along edges and narrow panels. Don’t forget to get inside corners and along the inner edges of the cabinet doors. Use a Shop-Vac to deal with the dust and debris when you’re done.

Brush on a coat of primer. Apply a basic primer to the areas you plan on painting. One thin, even coat should do the job. Primer will be useful for protecting the cabinet’s underlying materials and getting the paint to hold better. Primers should be specially formulated for use with the type of paint you’re working with. Water-based primers, for example, should be used only with water-based paints. Lightly sand dry primer to make the painting surface more uniform.

Put down painter’s tape. Use a few strips of painter’s tape to mask the underside and inner edges of the cabinets, including the area where the cabinet meets the wall. Mask the countertops as well. Make sure the tape is straight and even to avoid glaring mistakes. Painter’s tape will allow you to establish exact boundaries for your paint job and cover areas that you want to keep clear.

Wider tape will give you a greater margin of error and can be useful for painting near walls and trim. If you’d prefer not to remove your cabinet doors prior to painting, fold a piece of painter’s tape over the hinges to keep paint from getting on them. If your bathroom is small, consider painting the drawers and cabinet doors in another space that has better ventilation.


How to Fix a Bathroom Faucet?

Most of the time, a problem with a bathroom faucet involves a leak. Usually, faucet leaks are caused by worn washers or seats in the faucet assembly and these are easily replaced. There are several types of faucets, some that no longer use washers to create a seal in the assembly. Make sure that you recognize the type of  faucet that you have before attempting to fix a leak because different assembly parts and tools might be needed. In some cases, you might need to purchase a faucet repair kit that contains special tools for fixing specific faucets. In any case, fixing a bathroom faucet can be done in a matter of minutes with just a few replacement parts.

Locate the water valves under the sink and switch them off. Cover the sink drain to prevent parts from getting lost. Pry off the cap from the sink handle. Remove the screw that holds the handle on. Remove the faucet handle. Unscrew the nut. Unscrew the stem. Coat the new washer with plumber’s grease. Replace the seat washer. Remove the stem from the packing nut. Coat a new O-ring with plumber’s grease. Replace the O-ring. Reassemble the faucet.

Ball-Type Faucet. Purchase a faucet repair kit for this type of faucet. Remove the handle by unscrewing the set screw and lifting the handle. Remove the cap. Remove the collar. Loosen the cam and lift it out. Remove the seals and springs from inside the faucet with a needle-nose pliers. Remove the old O-rings. Roll on the new, greased O-rings. Install new springs. Install new valve seats and washers. Reassemble the faucet.

Cartridge Faucet. Remove cap. Remove the screw on the handle. Remove the handle by tilting it toward the back of the sink. Remove the retaining clip (if present) with a needle-nose pliers. Pull cartridge up and out. Cut off the O-rings with a utility knife. Install new, greased O-rings. Reassemble the faucet.

Ceramic-Disk Faucet. Locate the handle set screw and remove. Lift the handle off. Remove the cap. Remove the cylinder mounting screws. Lift the cylinder out. Remove the seals from the cylinder. Clean the cylinder openings with vinegar and rinse. Replace the seals. Reassemble the faucet. Place the handle to “on” and turn on the water very slowly so as to not damage the ceramic disk.

How to Use Circulating Light in a Black Bathroom?

Featuring a bit of black in your bathroom decor can add class and excitement to the room’s ambiance. Black paint, for instance, can be used for quick, striking renovations. There are other ways to incorporate black in the bathroom as well, including reflective black tile. In fact, using mirrors and features to help circulate light will make a bathroom with black features stay both beautiful and inviting.

Use reflective material for black walls. If you’re envisioning a bathroom with black walls, it’s important to use a material that will reflect light and create an inviting, comfortable atmosphere. For instance, walls of black tile will be far more enlivening than walls that are simply painted black. Either porcelain or ceramic tiles will work. For an even cleaner, sleeker look, consider using sheets of black glass to wall your bathroom.

Avoid using too much black. Imagine a room in which everything is black. It would simply not be a comfortable room. Psychologically, in fact, too much black can cause occupants to feel claustrophobic. Further, black absorbs light, so too much black can make a room dark and unwelcoming.

Use shiny fixtures and accents. White bathroom fixtures aren’t the only way to add light and shimmer to a darkly-colored bathroom. Incorporate plenty of glass and metal as well. The more reflective the material, the better. Chrome faucets and glass handles, for instance, can add a vibrant feel to bathroom with a lot of black.

A variety of materials can also help fight the tendency for darker rooms to feel a bit dreary at times. Feature mirrors prominently. One of the best ways to maximize light, especially in a dark room, with with a large mirror. A wide sink mirror, especially with built-in lighting, is ideal. Another option is adding a floor-length mirror to the bathroom, or replacing cabinet doors with swing-out mirrors.

How to Incorporating Other Features in a Bathroom?

Contrast black with white. The drama that a black bathroom can offer is most prevalent when there is a healthy amount of white to provide some striking contrast. The brighter the white the better. Further, classic white fixtures, such as the sink and tub, will not only provide great contrast to black, but will reflect light well.

Another good way to add contrast to dark walls is by painting the ceiling white. This will also help the bathroom feel cleaner and more open. Incorporate texture. If material costs are not a factor, consider going with black marble walls. The variously-colored veins that run through marble will add subtle and appealing contrast. Another way to add texture along with a touch of black is by staining any wood features with an ebony stain.

Dark, textured materials create shadows within a 2-D surface, which imbues a room with character in class. Opt for black flooring. A great alternative to black walls is black flooring. This is likely the best option in bathrooms do not have windows. The classic example would be black, reflective tiles, perhaps held in place with a bright white grout.

Checkered white and black tiles is also popular, and for good reason – it adds both class and enjoyment to a bathroom. Outfit the bathroom with black items. There are plenty of specific ways to add an extra splash of black to the bathroom. For instance, a dark black floor mat will look especially good on a light colored floor surrounded by black walls. If only some of your walls or your cabinets will be black, consider hanging photos in black frames.

Whatever you choose, try to feature black accessories in locations that will stand out. For instance, store folded black towels on metal or glass shelves, as opposed to hanging them in front of a black wall.

How to Using Black Paint in a Bathroom?

Paint only one or two walls black. If you want all of the walls in the bathroom to be black, it’s likely better to go with black tile, as the reflection offered by the tile will prevent the room from being too dark. You can add depth and class to a bathroom by painting one or two of the walls black, however. More specifically, opt to paint the wall furthest from the door black. This will make the bathroom feel larger. It can also be striking to paint small, oddly-shaped walls black as well.

Avoid painting any sloped walls, especially walls that rise to the ceiling, with an especially dark paint. Select an off-black paint. Straight “jet” black should be avoided, especially flat black. Extremely dark, matte black walls will actually make your bathroom seem smaller, if not a bit depressing. Fortunately, black paint blended with another color can often add a sophisticated look to certain sections of your bathroom.

For instance, select a black with a bit of gray or brown in it. As a rule of thumb, if the rest of your home features cool tones, go with a grayish black. If most of your home features warm tones, opt for a brownish black instead. Another great option is a black paint with a bit of blue or purple undertone. These are especially good in bathrooms that include wood accents.

Get a high quality paint. Some paints are designed to be used in bathrooms specifically – but this is mostly a marketing gimmick. More to the point, a high quality, self-priming paint will have many of the qualities you need in a bathroom paint, including mildew-resistance and a tough, tight finish to keep moisture out. In terms of finish, lean towards semi-gloss, as this tends to be the most resilient, and the easiest to wash.

Aside from quality paint, good painting technique is also vital. This will include washing, and potentially sanding, beforehand. Don’t try to match black paint to other black decor. If you’ll be decorating with other shades of black in the bathroom – for instance, on cabinetry or fixtures – do not try to match the color of your wall paint exactly. If you use multiple shades of black that are similar, but not identical, to one another, the results will look better.


How to Replace a Bathroom Faucet?

Install the gasket. The gasket is a rubber or plastic piece that sits between the faucet and the sink to ensure a proper seal and prevent leaks. Fit the gasket over the bottom of the faucet, matching the holes in the gasket with the tailpipes and valves on the faucet. Plastic gaskets generally snap onto the faucet, so be sure to seat them properly so the faucet is tightly sealed. If your faucet didn’t come with a gasket, you’ll need to apply sealant or plumber’s putty before installing the faucet. Follow the manufacturer’s directions and lay down a thin layer of sealant or putty right before you put in the faucet.

Wrap all the threads with plumber’s tape. Plumber’s tape is designed to lubricate fittings and create a better seal between components. Wrap the end of the faucet tailpipes with a layer of plumber’s tape, making sure the tape doesn’t extend beyond the end of the pipe. The tailpipes are where the water supply hose will attach to the faucet, and the tape will prevent leaks.

Insert the new faucet. Hold the faucet in both hands and carefully set it into the mounting holes. Match the tailpipes and valves with the proper holes, and place the faucet into position. Once the faucet is in the mounting holes, insert a washer over each tailpipe, and then twist on the nuts by hand. To tighten the nuts, turn them to the right (clockwise). When you’ve tightened the nuts by hand, finish tightening them by turning them another quarter turn with the adjustable wrench if necessary. Avoid tightening the nuts any further, or you could damage the sink.

Attach the water supply hoses. Start by attaching the hoses to the faucet first. Attach each hose to the tailpipe of the faucet, and then tighten the nut by hand. To finish tightening the nuts, use the basin wrench to turn each nut a quarter turn to the right (clockwise). Once the hoses are attached to the new faucet, reattach them to the water supply. Turn the nuts by hand to the right (clockwise), then tighten them the rest of the way with the adjustable wrench.

If you are attaching the supply lines to copper pipes with threaded fittings, hold the copper pipe securely while connecting the supply lines to ensure the pipes don’t twist or break. Turn on the water and test the faucet. When everything is connected and tightened, turn the water back on by turning the shutoff valve to the left (counterclockwise). Then turn on the taps to flush out the new faucet. When the water is running, check for leaks and drips. To flush the faucet, simply let the hot and cold water run for 1 to 2 minutes.

How to Removing the Old Faucet?

Disconnect the supply tubes. These are the tubes that connect the faucet to the water supply. Use the adjustable wrench to loosen the nuts where the hoses attach to the water supply. Use the basin wrench to loosen the nut attaching the hoses to the faucet. Turn the nuts to the left (counterclockwise) to loosen them. Once you’ve loosened the nuts with the wrenches, you can remove them the rest of the way by hand. Wipe up any water that drips onto the bottom of the vanity immediately to prevent damage or warping.

Loosen the lock nuts to take out the old faucet. Most faucets are attached to the sink by locknuts attached to the tailpieces under the sink. Use your hands or an adjustable wrench to loosen the nuts and unthread them from the tailpieces. Turn them to the left (counterclockwise) to loosen them. Remove the nuts and the washers from the tailpieces. Once you’ve removed the supply lines, nuts, and washers, the faucet will be loose. Hold the faucet in both hands and pull it straight out from the mounting holes. Remove the gasket if there is one and set it aside with the faucet. Use the flashlight to locate the nuts under the sink if you’re having trouble locating them.

Scrub the faucet holes. With a sponge or gentle abrasive pad, scrub the mounting holes around the sink where the faucet sits. Use soap and water or your favorite cleaner or detergent. Once the area is clean, rinse it well, pat it dry, and let it air dry completely. To remove old sealant or silicone, dampen a sponge or rag with mineral spirits and wipe the area clean. Then rinse the area with clean water and pat it dry.

Determine what kind of faucet you have. Once you’ve removed the old faucet from the mounting holes, you can figure out what hole configuration you’re working with and the type of faucet you need. There are three major types of faucets:

Single hole, where the sink will only have one hole for the faucet, and the faucet will all be one simple piece with a single handle. Center-set, where there will be three holes in the sink and the one-piece faucet will have separate handles controlling the hot and cold water. Widespread or split-set, which work with three-hole basins, but the spout and two handles come in three separate pieces.

Purchase a new faucet. Before you go to the home or hardware store for a new faucet, determine the type of faucet you have, look at your basin hole configuration, and measure the distance between the holes so that you get the right replacement faucet. Write down the number of holes your basin has, the type of faucet that was on there, and the distance between the holes. If you want to replace your old faucet with a new kind, you’ll have to replace the basin as well.