Posts

How Laying the Tiles?


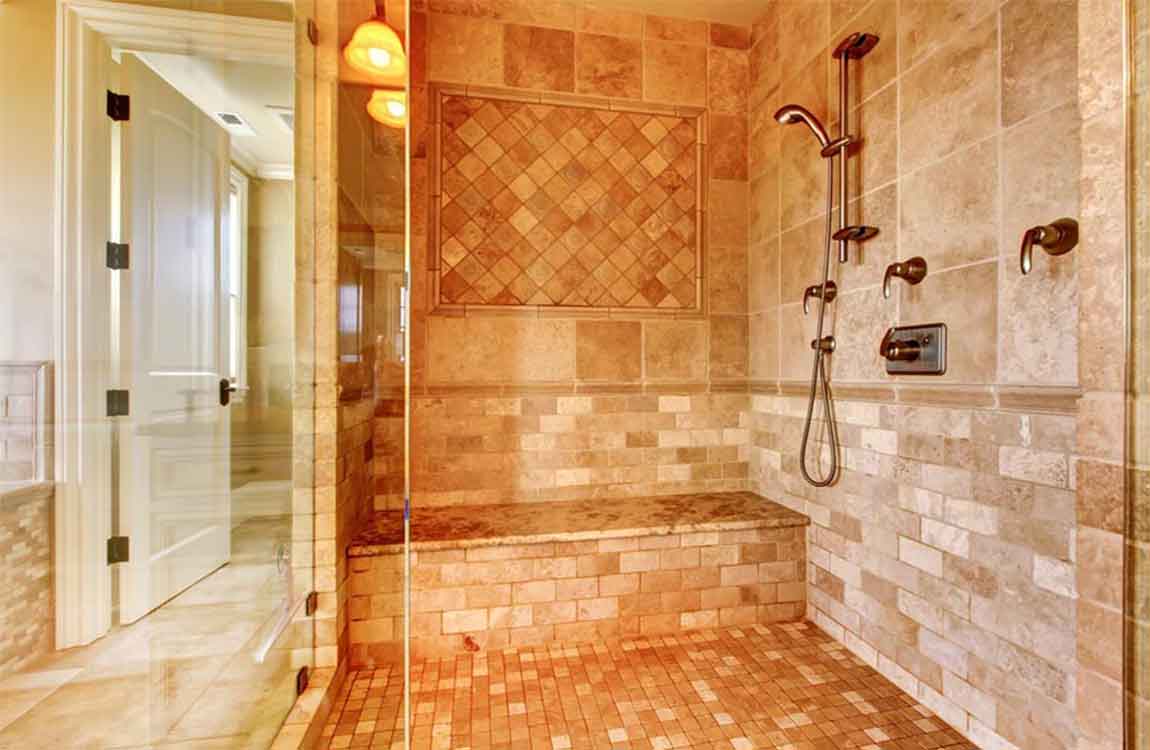
Mark your tile layout on the substrate and mark out your first course carefully. If your shower enclosure walls are not perfectly square, or if you plan to install accent tiles, the layout of these tiles becomes increasingly important. Measure up from the bottom of the backer board the height of a tile minus 1/2″. This will give you a 1/2″ overlap over the tile lip on your shower pan.


Make sure that you allow room for the grout joints as well. Mark this with a sharpie or chalk and using a level, transfer the mark across the shower stall. This will be a guide for the top of the first row so that all tiles will be level. Only use dry tiles make sure that the lay out works as well. Another way to plan out the first row of tiles is to measure the high part and low part of the shower pan.


Make the cut spot on the low end a full tile, mark it, and then cut the tiles on the high side down to the level of the uncut tile on the low side. Keeping grout lines away from the inside corners of the enclosure can prevent the need for tiny tiles and poor grout joints. Plan accordingly and always make cuts tight on the inside corner.


Mix enough thin-set for the bottom row. You want your thin-set to be the consistency of peanut butter — not too thick or it will dry out and not too thin or you’ll have a hard time setting the mortar with strength and cleaning. Use an electric drill and a mortar mixing bit attached to your drill to mix your thin-set mortar. This will ensure even consistency and ultimately a better product.


Let the mortar set for seven minutes and then mix it again. Dampen the cement board with a sponge before applying the mortar. If you do not, the cement board will draw the moisture out of the thin-set too quickly, making for a brittle set that is susceptible to cracking.


How Leveling and Prepping Your Work Area?


Purchase a tub that matches the size and layout of your old one. Measure the size of the alcove and note the drain direction. Use a tape measure to find the maximum length and width of the alcove. Note whether your drain is on the left, right, or center of the tub Find a tub from your local home store that fits in the alcove and has a drain in the same place.


Most standard tubs are about 5 feet (1.5 m) long and 2 1⁄2 feet (0.76 m) wide.
Common Types of Bathtubs: Acrylic and fiberglass tubs are the cheapest and the easiest to maneuver due to their light weight. Cast-iron tubs are durable and hold heat longer, but they are heavier and difficult to maneuver.


Level the floor with an underlayment if it’s not already flat. Underlayment is a thin layer of concrete that smooths the surface of your floor. Check your floor with a level to see if it sits flat. If not, mix the underlayment following the package instructions and spread it across your floor with a flat trowel. Smooth the surface and allow it to dry for 1 day so it has time to set.


Applying a layer of underlayment allows you to remove the tub easier if you need to fix any plumbing issues. Underlayment can be purchased from your local hardware store. Fit the new tub into the alcove and mark the height of the flanges. Set your new tub into the opening where the old one used to be. Make sure your tub sits level on the floor.


Use a pencil or marker to trace a line on your studs at the same height as the flanges on your tub. Once you have each stud marked, take the tub out from the alcove again. If the tub isn’t level, place hardwood shims underneath it until it sits flat. Attach ledger boards to the studs below your flange marks. Nail or screw 2 in × 4 in (5.1 cm × 10.2 cm) boards so the top edge is even with the marks you drew on the studs. Use flat, straight boards that are the same length as the sides of your tub.

How Removing Stains from the Ceramic Sink?


Soak the sink with a bleach solution. In an empty plastic spray bottle, combine a 1:1 solution of bleach and water. Lightly shake the bottle to mix the solution. Open the window or turn on your bathroom fan before you start spraying the bleach solution, as this will provide ventilation. Then, spray the bleach solution over the entire interior surface of the ceramic sink. Let the bleach mixture sit and soak for about 10 minutes. Then, use a sponge or an old rag to wipe the sink clean.


Bleach is a strong chemical and can be very harmful if ingested or sprayed in the eyes. Use caution when spraying bleach, consider wearing safety goggles or at least rubber gloves, and wear clothing that you don’t care about. If there are young children in your house, make sure that they’re not near the sink when you’re spraying bleach.


Apply cream of tartar and vinegar. If you would prefer to not use any chemical cleaners, you can remove stains from the ceramic with a mixture of cream of tartar and vinegar. Combine the cream of tartar and the vinegar at a 1:1 ratio in a small mixing bowl, and stir them together. Then, spoon some of the mixture onto the stains on your ceramic. Let this sit for about 10 minutes, and wipe clean with a sponge.


This method will also work if you substitute hydrogen peroxide for the vinegar. All three of these ingredients can be purchased at your local grocery store or supermarket. Scrub the stain gently with a pumice stone. Pumice stone is quite abrasive and can scrub stains off of your ceramic. Before using, run the pumice under water, and make sure that the stone stays wet while you’re rubbing out a stain. Then, lightly scrub at the stained area of your ceramic sink. The pumice should remove the discoloration.


Be careful when using this method. If you apply a pumice stone to a ceramic sink, the stone may scratch or damage the surface. Begin by rubbing gently, and stop if you see any scratches forming.

How Cleaning Sink with Baking Soda and Lemons?


Dampen your sink. Before you apply the baking soda, lightly dampen the basin of the ceramic sink. You can do this by allowing the sink to fill with water and then draining it, or using your hand to splash water around on the sides of the basin. Make sure that no standing water is left in the sink, as this will dissolve the baking soda and render it useless.


Also dampen the sponge that you plan to clean the sink with. You don’t want the sponge soggy, so wring it out well before you start cleaning. Sprinkle baking soda into the sink. You can start by adding about ½ cup (0.25 liter). Use your fingers or a spoon to sprinkle the baking soda in the basin of the sink, until the ceramic has been fully coated. Make sure to apply baking soda to any areas that are soiled or stained.


Scrub the baking soda with a damp sponge. Baking soda functions as a mild abrasive, and will be effective at cleaning mineral buildup, leftover toothpaste, and general dirt and grime off of the ceramic. Rinse the sponge as needed, and make sure to wring it out fully before you return to scrubbing the ceramic. Once you’ve cleaned the sink, rinse it well with water.


While you’re scrubbing, you should notice the baking soda clumping together into small lumps. This is a good sign: it means that the baking soda is not too wet, and that it’s effectively picking up dirt from your sink.


Whiten the sink with lemon slices. To naturally “bleach” your ceramic sink, start by cutting a lemon into several wedges. Take each wedge and rub it around the basin of the sink, making sure to squeeze out plenty of lemon juice on the ceramic. You can use the tough skin of the lemon to scrub at stains or other darkened areas.

How to Clean Soap Scum from Glass Shower Doors?


If you have glass doors in your shower, you’ve probably noticed that after a while, a white film tends to build up on the glass. This soap scum is caused by the mixture of animal fats in soap with some of the minerals in your shower water. Fortunately, you don’t have to put up with this scum on your door! You can easily clean off the scum with a commercial cleaner or ordinary household products. Then, all you have to do is make a few simple lifestyle changes in order to keep the scum from building up again.


Mix vinegar and baking soda to clean stains as well as soap scum. Pour 1/2 cup (115 grams) of baking soda into a small bucket, then add about 1⁄4 cup (59 mL) of white vinegar to the bucket. Use a spoon to stir these ingredients into a paste. Dip a clean sponge into the paste and wipe it on your shower door. Let it sit for 15 minutes, then rinse the paste off the door while scrubbing it with a microfiber cloth.


The paste that forms in the bucket should be about the consistency of pancake batter. You may need to add a bit more baking soda or a bit more vinegar to the mix in order to get it to this consistency. This is the best method to use if there are also hard water stains on your shower door that you want to get rid of.


Go with toilet bowl cleaner if that’s all you have. Although it’s not designed for cleaning glass shower doors, toilet bowl cleaner is occasionally effective at removing soap scum. Soak a sponge in hot water, then apply a small amount of toilet bowl cleaner to the sponge. Wipe the shower door with the sponge to clean off the soap scum, then rinse off the residue once you’re done.


Be sure to keep your bathroom well ventilated when using toilet bowl cleaner. The odors from the cleaner can be pretty powerful, especially in a small room. Use lemon juice and salt if the door frame is made of metal. This is the best cleaning method to use to also remove any rust on your door’s metal frame. Mix 1 tablespoon (15 mL) of lemon juice with 2 tablespoons (34 grams) of salt to form a cleaning paste. Use an old toothbrush to scrub this mixture into the door frame and let it sit for about 5 minutes. Finally, rinse it off with warm water.

How Using Vinegar and Water?


Mix together vinegar and water. Ordinary vinegar makes a versatile cleaning solution that’s both safe and all-natural. Combine equal parts distilled white vinegar and warm water in a small spray bottle. Shake the bottle to make sure the two liquids are thoroughly blended.


The heat from the water will be even more helpful for releasing dried stains from the surface of the shower. For even better results, add a few drops of mild liquid dishwashing detergent. The soap will emulsify dirt and oil while the vinegar brightens and disinfects.


Treat problem areas with the vinegar solution. Mist the inside shower with the vinegar solution. Be sure to address spots with the worst buildup. This may include unexpected places like the shelving at the top of the shower or the area around the drain. Don’t forget to get inside cracks and crevices and along recessed panels and soap dishes. Pure vinegar makes the perfect antidote to mold and mildew growth.


Leave the vinegar to break down stains. Vinegar is an effective natural solvent, but it requires a little time to work effectively. For most light or moderate messes, the vinegar should sit for at least half an hour. To remove heavier buildup, you may even want to let it remain for 1-2 hours to ensure success.


If vinegar alone isn’t cutting it, sprinkle a little baking soda over the affected area before spraying it again. The foaming action produced by the two cleaners will eat away at stubborn gunk and grime. A mixture of hydrogen peroxide and cream of tartar can make a convenient substitute for baking soda and vinegar.

How Removing Tough Stains?


Dissolve limescale buildup with equal parts vinegar and water. Avoid using commercial products that have anti-limescale ingredients since they could leave the enamel looking dull. Instead, remove the chalky buildup by mixing together equal parts of white vinegar and water. Dip a soft cloth into the diluted vinegar and rub it on the limescale until it dissolves. Rinse the area and dry it immediately.


Avoid rubbing the diluted vinegar over other parts of the tub that don’t have limescale since this could damage it. Apply diluted chlorine bleach to stains. For most stains, mix together 1/2 cup (120 ml) of chlorine bleach and 1 gallon (3.8 liters) of water. Dip a cloth in the solution and rub it over the stain. You can also spray the solution directly on the stain. Let the bleach solution sit for 1 to 2 minutes and then rinse it off. Dry the tub once the stain is removed.


Do not apply bleach right after you apply vinegar, as they will form a noxious gas if they mix. When you need to use both vinegar and bleach, make sure you thoroughly rinse away the vinegar before you apply the bleach, and vice versa.


Soak stains with a paste of hydrogen peroxide and cream of tartar. If you have tougher stains that don’t disappear after using the bleach solution, make a gentle cleaning paste. Mix together 1 part hydrogen peroxide with 2 parts cream of tartar. Spread this paste over the stains and let it sit for 30 minutes to 1 hour. Use a soft cloth to wipe away the paste and then rinse the area. Dry it if the stains are gone.


As an alternative, you can use baking soda and vinegar to remove tough stains. Sprinkle the baking soda over the stain, then spray vinegar onto the baking soda. The vinegar and baking soda will react to each other, creating a foam. Let the foam sit for 5-10 minutes, then scrub it away with a clean cloth. If the stains aren’t gone, you can repeat the treatment until they disappear.

How Removing Stains from an Enamel Bathtub?


Try cleaning with vinegar first. Though it’s a mild natural cleanser, vinegar will typically be potent enough to deal with most stains when applied heavily and given time to set up. Spray the tub down thoroughly, let the vinegar sit for a few minutes, then scrub aray the stains using a sponge or stiff-bristled brush. If you discover that vinegar isn’t having the desired effect, you can move on to more intensive methods. There will come a point when simply adding more and more vinegar won’t suffice.


Use a bleach-free commercial cleaning spray. Products like Lysol All Purpose Cleaner, Kaboom, Shout! and Scrubbing Bubbles shower cleaner are good for eating away at tough stains without damaging delicate surfaces. Since most of these products contain a similar combination of ingredients, any of them will work as well as another. Just make sure whatever product you choose doesn’t contain bleach, as this can severely weaken the outer enamel layer of the tub.


Only buy cleaners that have been approved for use on enamel-coated bathroom surfaces. Be sure to check the label carefully before buying a particular cleaning product so you’ll know you’re getting what you need. If possible, open a nearby window, open the door, and turn on a fan to ventilate the bathroom while you clean with any of these products.


Make your own natural cleaner. If you’re reluctant to go shopping, you can formulate a simple all-purpose bathroom cleaner at home by mixing together warm water, baking soda, Castile soap and essential oils in a spray bottle. All of these ingredients are readily available and safe to use but are quite potent when brought together. Once they’re combined, spray the mixture onto the stained surface and give it a few minutes to take effect before wiping it away.


If you’re having trouble tracking down Castile soap, hydrogen peroxide will make an acceptable substitute. Essential oils like tea tree and peppermint can also act as natural disinfectants. Soak problem areas for several minutes. Mist on the solution and give it a chance to sit. Pay special attention to places with heavy staining and discoloration. The cleaning solution should get to work dissolving these stains right away.

How to Clean a Bathtub?

No one likes a grimy bathtub, but no one likes to clean it either. However much you dread this task, you have many options available to make the process simpler. You can use a natural cleaning product, such as grapefruits and salt, or a commercial product to thoroughly clean your bathtub.

Use baking soda paste. This paste works well for rust stains, but you can also use it as a general cleaner. To make the paste, add water to the baking soda until it forms a paste-like substance. Then, use a sponge to apply the paste to the areas you want to clean. Scrub the paste into the surface to help remove the stains. Finally, rinse away the paste.

If your bathtub is very dirty or stained, apply the paste onto the affected areas, then spritz over it with white vinegar. Allow the baking soda and vinegar to set on the stain for 10-15 minutes, then scrub with a sponge. Finally, rinse away the baking soda and vinegar. This should remove the stains.

Try borax and a lemon. This coupling also works well on hard stains. Dust the stain with borax. Cut a lemon in half, and rub it on the stain. Let it stand for at least 15 minutes. Wash it away.

Practice everyday cleaning. If you clean out your tub every time you shower, you won’t have a buildup over time. Use the shower to sprinkle the tub with warm water, washing away any dirt. Wipe off the water with a towel or sponge.
Apply as directed. Leave the cleaner to sit, or scrub it in as directed by the manufacturer. Don’t use a metal or abrasive brush as it can damage your tub. For hard to reach places, try scrubbing using an old toothbrush and one of the aforementioned cleaning products.

The Knowledge of Replacing an Undermount Sink

Secure the sink in position with a piece of lumber and a bar clamp. Cut a section of 2 in × 4 in (5.1 cm × 10.2 cm) lumber so it’s at least a few inches/centimeters longer than the width of the opening for the sink in the countertop. Lay this piece of wood across the opening. Then, while a second person lifts the new sink up into place from beneath, feed the bar clamp up through the drain opening of the sink so that one of its clamps holds up the sink from below. Secure the other clamp to the piece of wood and tighten it.

Make sure the clamp is tight enough to make the some of the silicone caulk squeeze out between the rim of the sink and the underside of the counter. Wipe away this excess caulk with a damp rag. Secure the included clips in place with screws or epoxy. Your new undermount sink will come with support clips to place around the underside of the sink where it meets the underside of the counter. In some cases, these clips may attach with screws. If so, drill pilot holes and use a screwdriver to secure the clips in place. Otherwise, use the brand or type of epoxy recommended by the sink manufacturer.

In most cases, the clips are adhered in place with a 2-part epoxy that hardens in about 10 minutes after being combined. Follow the product instructions carefully and apply the proper amount to each clip. Then press them into place as per the installation instructions for your sink.

Wait 24 hours, then install the drain. Even though the epoxy should be fully set in 10 minutes, it’s important to give the silicone adhesive time to cure fully. Leave the piece of lumber and bar clamp in place for a day before removing them. After that, you can put the drain in place and continue with the installation.

Like faucets, drain installations vary by type and brand, but the process is DIY-friendly if you follow the instructions carefully. You could rely on the epoxy to hold everything in place after 10 minutes and not wait the full 24 hours before proceeding, but this is not recommended. Be patient.